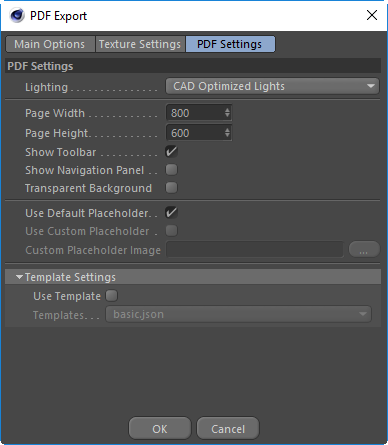
A drop down list containing all the lighting setups that are supported by Adobe Acrobat Reader. But selecting one of these options it will set the initial lighting setup to be this option when you open the resulting PDF file. Experiment with the different lighting setups in Acrobat Reader to find a default setting that you would like to keep using for future exports.
Choose Lights From File if you wish to use the lights from Cinema 4D scene itself.
Specify the width of the page in the PDF document.
Specify the height of the page in the PDF document.
Display the Toolbar above the 3D View in the Acrobat Reader.
Display the tree navigation pane by default when the user opens Acrobat Reader.
Make the background of the OpenGL viewport transparent.
When this option is enabled it will put a placeholder image on the page. This image is only displayed if 3D viewing is not yet enabled in the pdf document. Once the user trusts the 3D document the 3D content will be displayed over the top of this image.
If you wish to use your own placeholder image then you can do so by enabling this option and specifying the image to use.
Specify the image to use as your custom placeholder for scenes that are not yet enabled for 3D viewing.
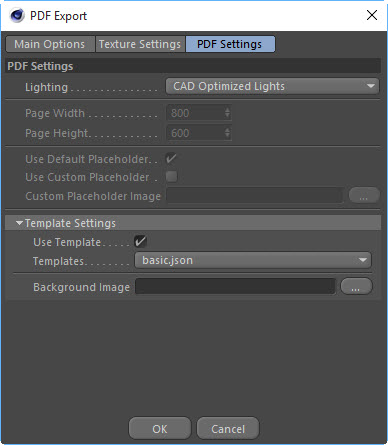
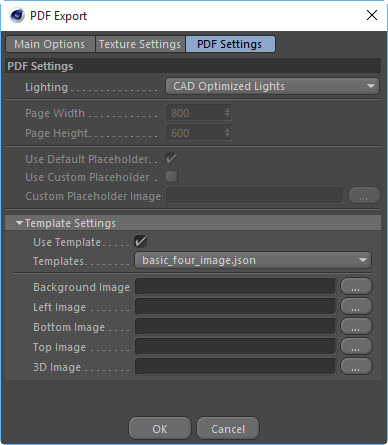
This will enable the use of the templates to layout the 3d window and additional images on the page. See the Appendix A: Templates section for more information on creating your own templates and how they work.
When Use Templates is enabled the templates will be loaded from the gld_4dpublish/res/templates directory and you will be able to select them from this dropdown menu.
When you select a template you will be shown all the available image slots that can be used on the selected template. When the scene is exported it will pace these images in the specified locations, according to the .json templates file.
You do not need to use an each image for each slot. If no image is specified then it will simply not be filled when creating the pdf document.
Note: Images are stretched to fill the area specified by the template. For best results make sure to use images that are the same width and height as what is written in the templates json file.
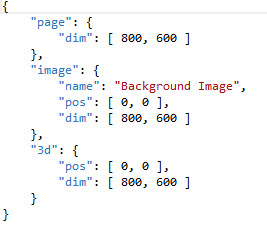
This template will create an 800x600 page with a full size image in the background (at 800x600). The background image is displayed first if the user has not yet enabled the 3d for viewing. Once it has been enabled it will then show the 3d model over the top of this image at 800x600 resolution.
Below you will see the Background Image option that the user can select during export, and the json file that is used to describe this template.
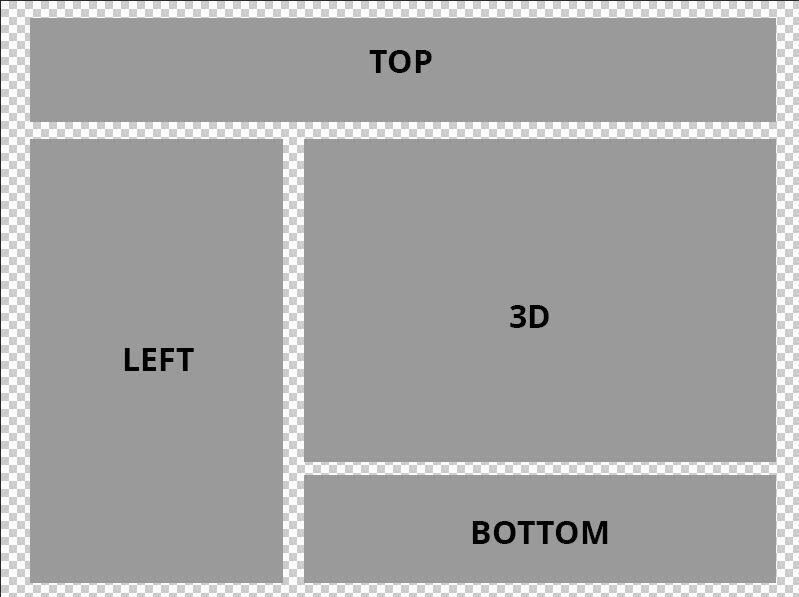
This is an example of a template that uses multiple images.
The layout for this will look like the following
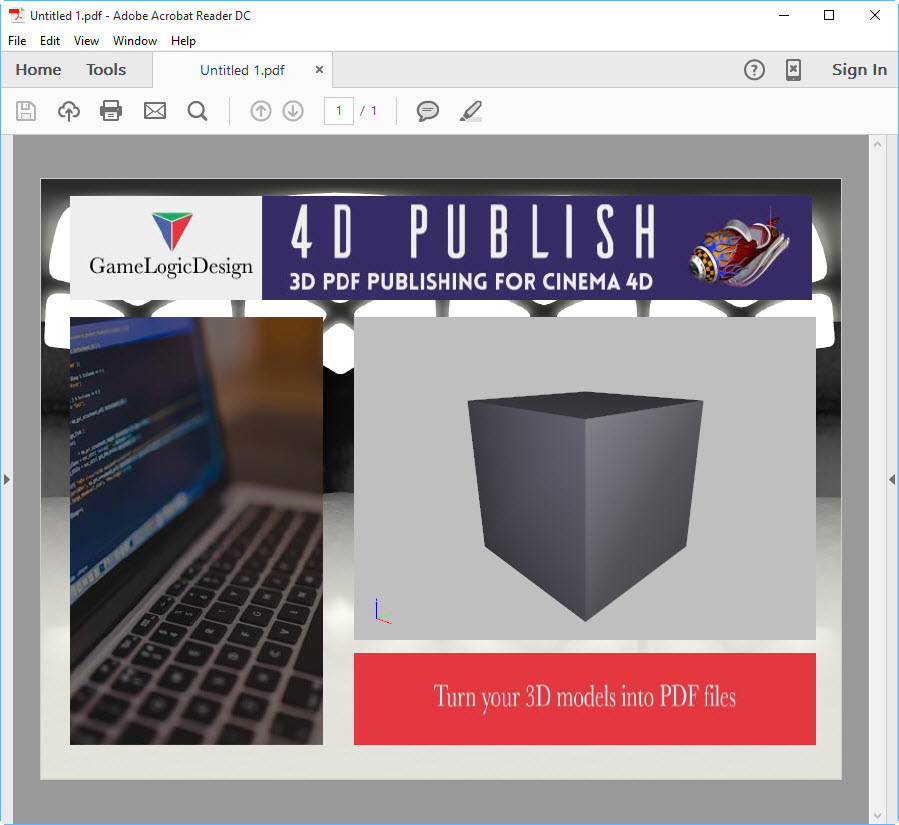
When all the images are filled in it will look something like this
The template json file for this template looks like this
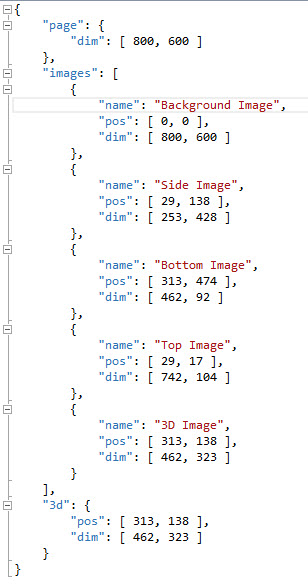
You can add as many images as you require. All images will be drawn over the top of each other from top down, with the “3d” (which is the 3d model) being the last to be drawn. You can create as many templates as you need.
If you have Photoshop then you can use it to help create the json file for your template.
Note: You will also be able to design templates directly from 4D Publish using the Vector Graphics system in a future update
Step 1: Duplicate one of the json files from gld_pdf/res/templates and give it a new name for your templates.
Step 2: Create a page in photoshop at the dimensions that you need.
Step 3: Set this as the page dim in your json file
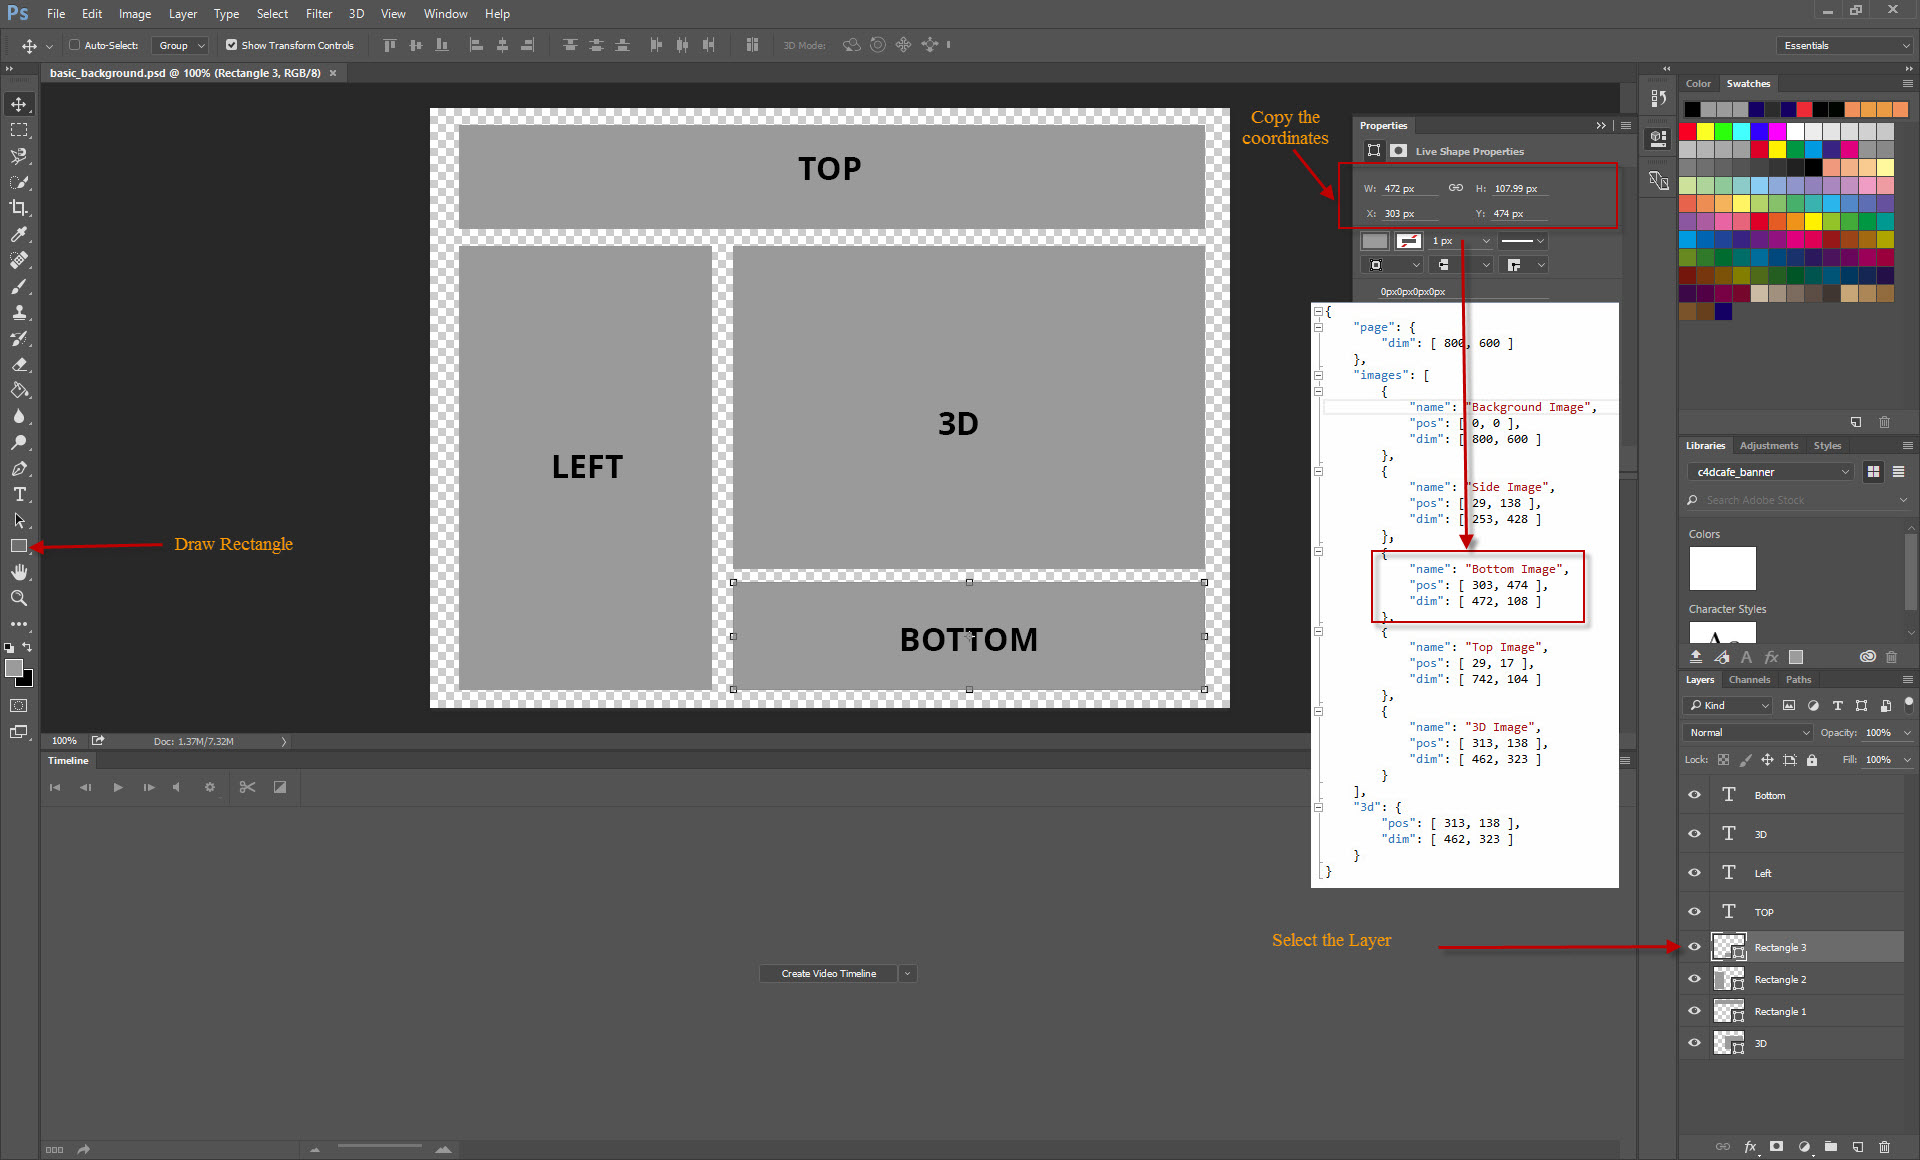
Step 4: Select the Rectangle tool and draw where you want an image to be on your page
Step 5: Make sure the layer is selected for your new rectangle

When it’s selected it should have handles around the rectangle and something like this in photoshop.

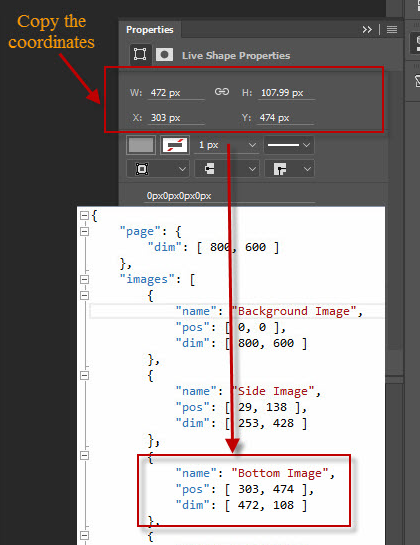
Step 6: Copy the coordinates for this box, from the properties window, into your json file, and give the image a name so that you can recognize it when you export.