4D Paint | Painting | Paint Brush
The following hotkeys are all standard in the Sculpting System. Where appropriate the hotkeys have been overridden to work with a painting workflow, but for most of them they work exactly as described in the Cinema 4D document for Sculpting.
Switches to a smooth brush to the apply a basic smooth filter to the surface.
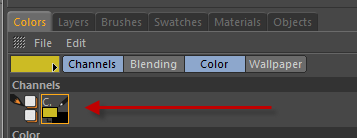
Switches from the foreground color to the background color set in BodyPaint.
In this example the brush will paint yellow when not pressed, but when the Ctrl Key is held down it will paint black.

By default the sculpting style brushes have the T key set to transform a stencil in the viewport. By holding down this hotkey you can do the following
If the T key is not setup on your machine then you can set your own hot key by searching for 'Sculpt Brush Stencil Adjust' in the command manager and assign your own override key for this feature. This key will override any other hotkey you have set up, but ONLY when you have a sculpt brush selected, such as the Paint Brush.
Tapping the Q key will hide or show the stencil in the viewport. This hotkey toggles the 'Visible' option on the Stencil Tab
Alt + X: Toggle X Symmetry Alt + Y: Toggle Y Symmetry Alt + Z: Toggle Z Symmetry
Tap the W key to show/hide the wireframe for the selected Polygon Object